Managing DNS Records
The next steps require you to be logged into Domain Control Panel and locate the domain you wish to manage.
How to log into Control Panel
How to locate the domain you wish to manage
After locating your domain, when you are on the domain information page, click on the DNS Management link on the right side panel.
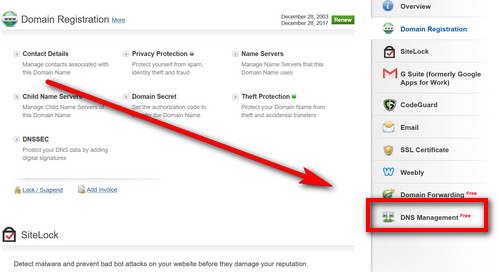
This will scroll down the page to the DNS Management section. Click on the Manage DNS link there.
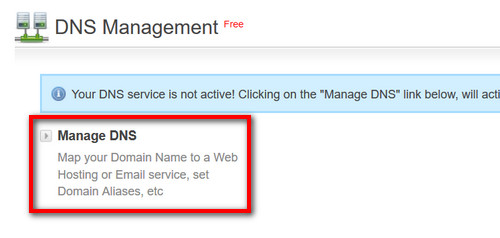
Do not click on this link if you are using a Web Hosting Service as this may auto change your Name Servers.
After clicking on the link a DNS Management panel will open up in a new window.
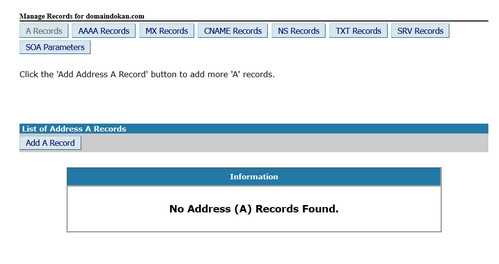
To manage a record first choose the record type (A, CNAME, MX etc) from the top.

To add new record choose the Add Record button.
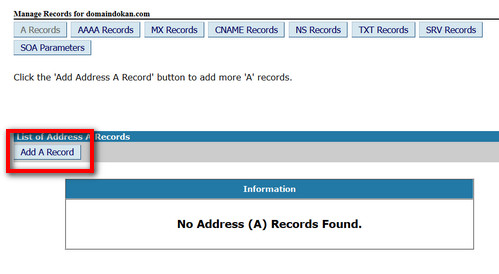
Depending on the record type you are adding, you will be presented with add screen with different fields.
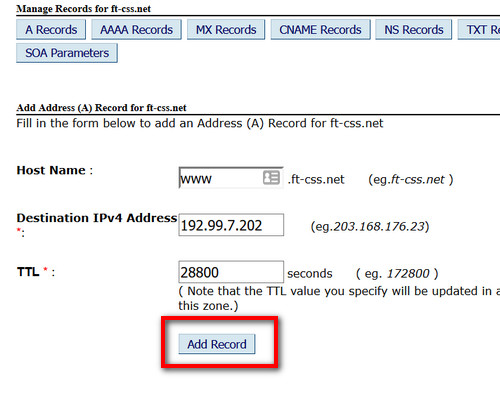
For A Record:
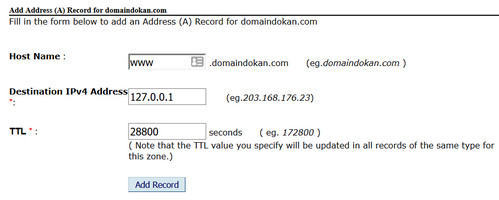
- Host Name: Here the domain name, for which you are adding the A Record for, would be pre-filled (e.g. yourdomainname.com). Now, if you wish to add an A Record for my.yourdomainname.com, then you would have to put in my the text box. If you wish to add A Record for just yourdomainname.com, then you can leave this box blank.
- Destination IPv4 Address: Here you would have to enter the IPv4 IP Address of the Web Server, where you wish to host this domain name.
- TTL: This is the Time To Live for this Record, in seconds. Any Server which once queries this Record will query it again after this time interval. The ideal TTL is 86400, which is 1 day. It can not be set to less than 14400, i.e., 4 hours.
For CNAME Record:
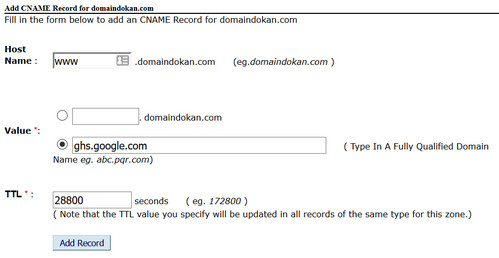
- Host Name: If you wish to Add a CNAME Record for yourdomainname.com like manage.yourdomainname.com or www.yourdomainname.com, then enter the Host Name as manage or www in this text box.
- Value: This is the Destination for the CNAME created. Thus, if you wish to create a CNAME Record for www.yourdomainname.com pointing to yourdomainname.com, then you would have to enter yourdomainname.com. in this text box.
- TTL: This is the Time To Live for this Record. Any Server which once queries this Record will query it again after this time interval. The ideal TTL is 86400, which is 1 day. It can not be set to less than 14400, i.e., 4 hours.
For MX Record:
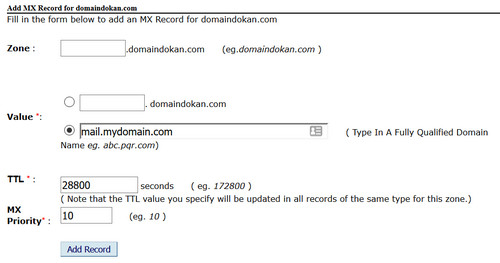
- Zone: The domain name for which you setting an MX Record needs to be entered as the Zone. If you are configuring the email server for yourdomainname.com, such that you can receive [email protected], then you need to leave this field blank.
- Value: This is the email server domain name. If the email servers hosting your domain name are managed by you, then you may set the Value in the format: mail.yourdomainname.com. If you are using another Internet Service Provider's email server, then you need to enter a Fully Qualified Domain Name (FQDN) like mail.isp.com.
- TTL: This is the Time To Live for this Record. Any Server which once queries this Record will query it again after this time interval. The ideal TTL is 86400, which is 1 day. It can not be set to less than 14400, i.e., 4 hours.
- MX Priority: An MX Record has a Preference number indicating the order in which the email server should be used (only relevant when multiple MX Records are defined for the same domain name). Email servers will attempt to deliver email to the server with the lowest preference number first, and if unsuccessful, continue with the next lowest and so on.
After filling up required information click on the Add Record button.
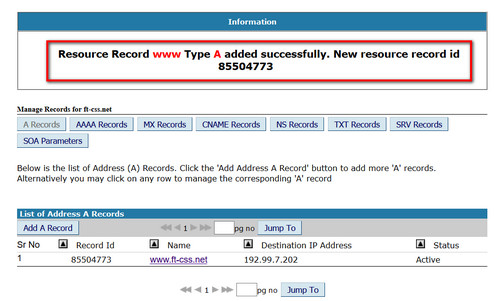
Upon successful addition you will see a confirmation message.
Please be aware that the way DNS technology works, any change made in DNS will take some time to propagate worldwide. So you may not see the results instantly.
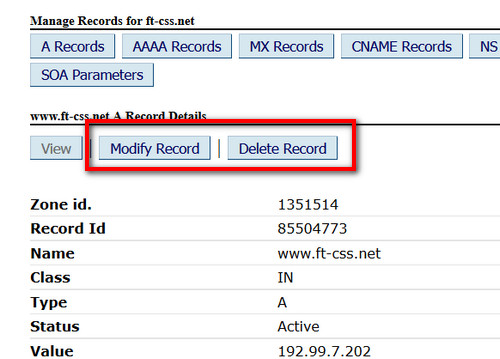
To modify or delete any record, click on the record in the List of Records.
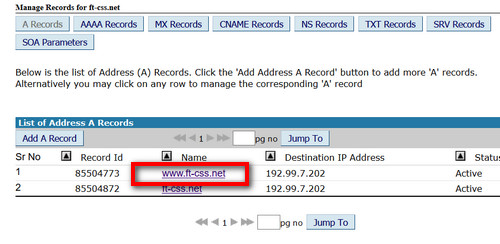
On the next screen you will have the option to Modify or Delete the record.