Using with Blogger
Blogger (also known as Blogspot) allows using your own domain with your blogger blog for free. Which means instead of myblog.blogger.com you can now use myblog.com as your Blogger URL.
To set up your domain with Blogger, first sign in to Blogger and select the blog you want to use the domain with.
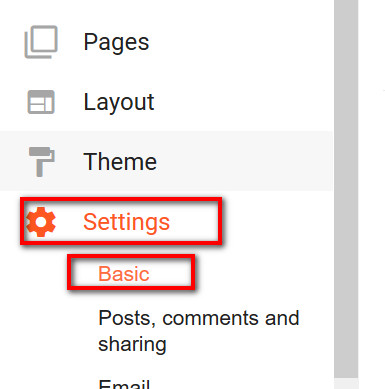
On the left, click Settings and then Basic.
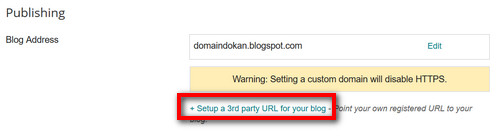
Then under Publishing click +Setup a 3rd party URL for your blog.
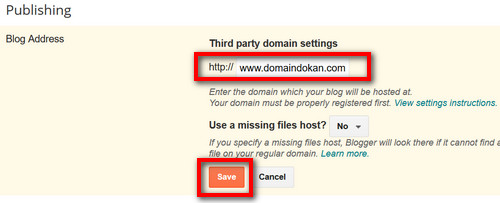
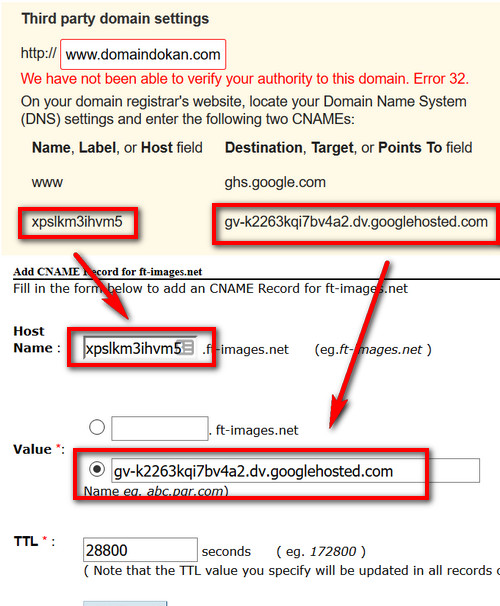
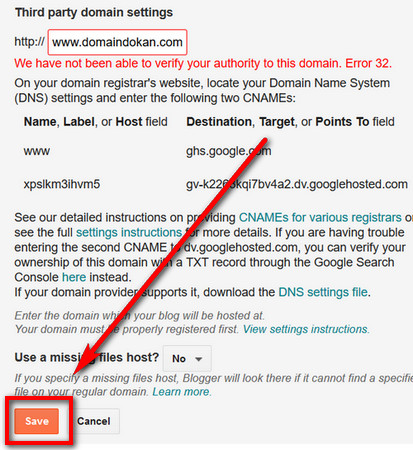
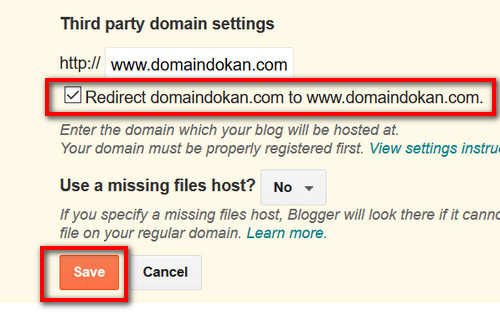
Type your Domain Name under Third party domain settings. Keep in mind that it must begin with www (or any subdomain) in order to work. Then click on the Save button.
Along with an error message "We have not been able to verify your authority to this domain. Error 32." you will be provided with two CNAME Records which needs to be added to your DNS.
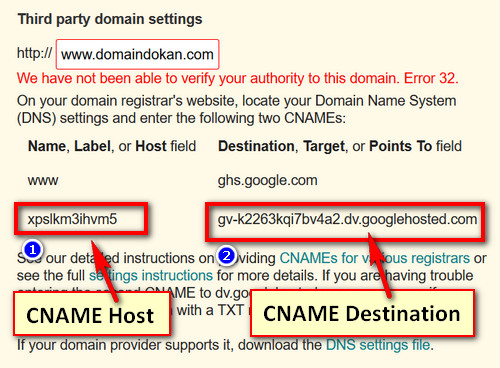
Note down the 2nd CNAME record as marked on the image above. We will refer the first part (#1) of it as CNAME Host and 2nd part (#2) as CNAME Destination. We will need these values later.
Now you need to log in to our Domain Control Panel and locate your domain.
The next steps require you to be logged into Domain Control Panel and locate the domain you wish to manage.
How to log into Control Panel
How to locate the domain you wish to manage
After locating your domain, when you are on the domain information page, click on the DNS Management link on the right side panel.
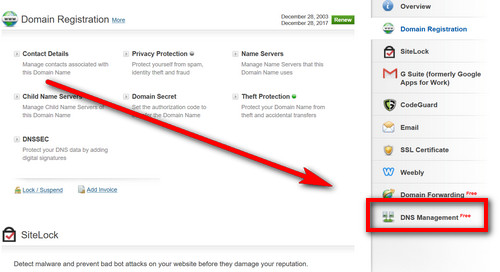
This will scroll down the page to the DNS Management section. Click on the Manage DNS link there.

After clicking on the link a DNS Management panel will open up in a new window.
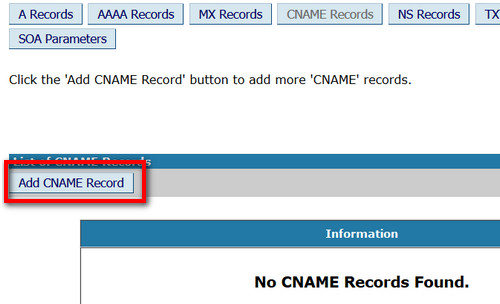
Click on the CNAME Records button.

Then click on the Add CNAME Record button.
Now we will need to enter the values Blogger provided us which he referred as CNAME Host and CNAME Destination earlier. Then click on the Add Record button.
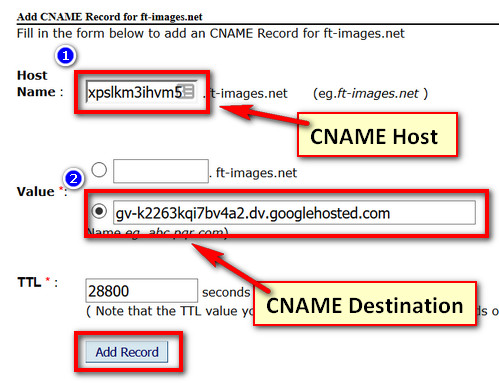
For your easier understanding, this is how the values are linked:
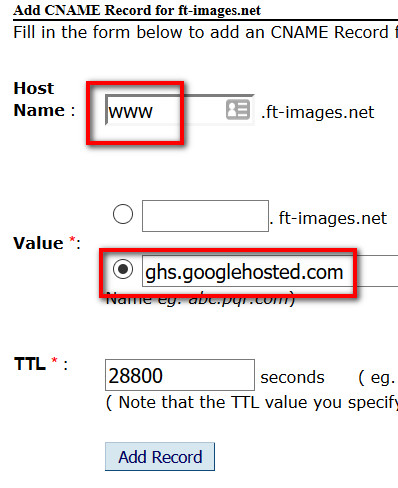
After adding that record we will need to add another CNAME Record in the same way. This time we will add www as CNAME Host and ghs.googlehosted.com as CNAME Destination.
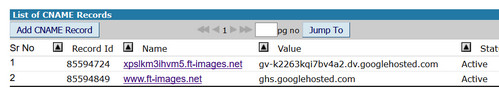
Now our CNAME Record List should look like this:
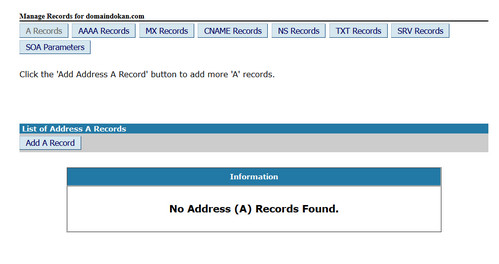
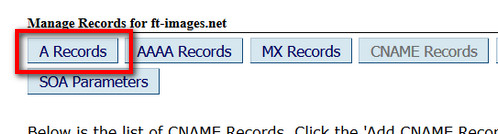
If you want to make your blog accessible with yourdomain.com (naked-domain) along with www.yourdomain.com, we will also need to add 4 A records.
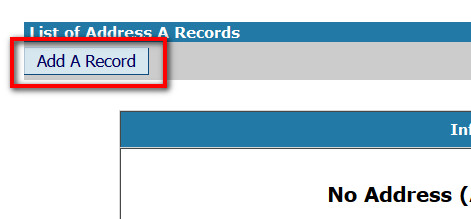
For that click on the A Records button.
Then click on the Add Records button.
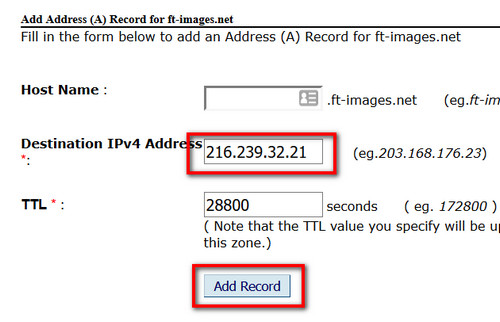
Leave the Host Name field blank and enter the IP 216.239.32.21 in the Destination IPv4 Address field. Then click on the Add Record.
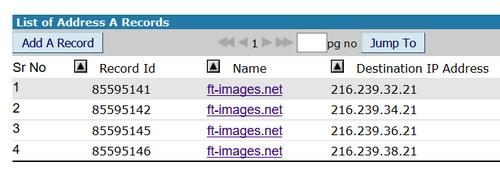
In the same way we will be adding 3 more IPs in the Destination IPv4 Address field leaving Host Name field blank.
The additional IPs are:
- 216.239.34.21
- 216.239.36.21
- 216.239.38.21
After adding all our A Records List should look like this:
Now you need to go back to your Blogger account and click on the Save button.
When you add or modify any DNS record, it takes some time for the change to propagate worldwide. For that you may keep getting the error "We have not been able to verify your authority to this domain. Error 32." for some time. In that case try clicking the Save button again after some time.
Once Google detects the DNS Records you have added, your domain will be successfully added and show up as your Blog URL.

Now to enable naked domain setting (to make your blog accessible with yourdomain.com (naked-domain) along with www.yourdomain.com) click on the Edit link next to your blog domain.

Check the Redirect domain.com to www.domain.com option and click on the Save button.
Done! Your domain will now be showing up your Blogger site.
Note that due to the delay with DNS Propagation, it may take some time for your domain to be resolving your blogger site.